Roof Lantern Installation in York
Daylight down the middle of the room, fitted with the house protected and handed over properly.
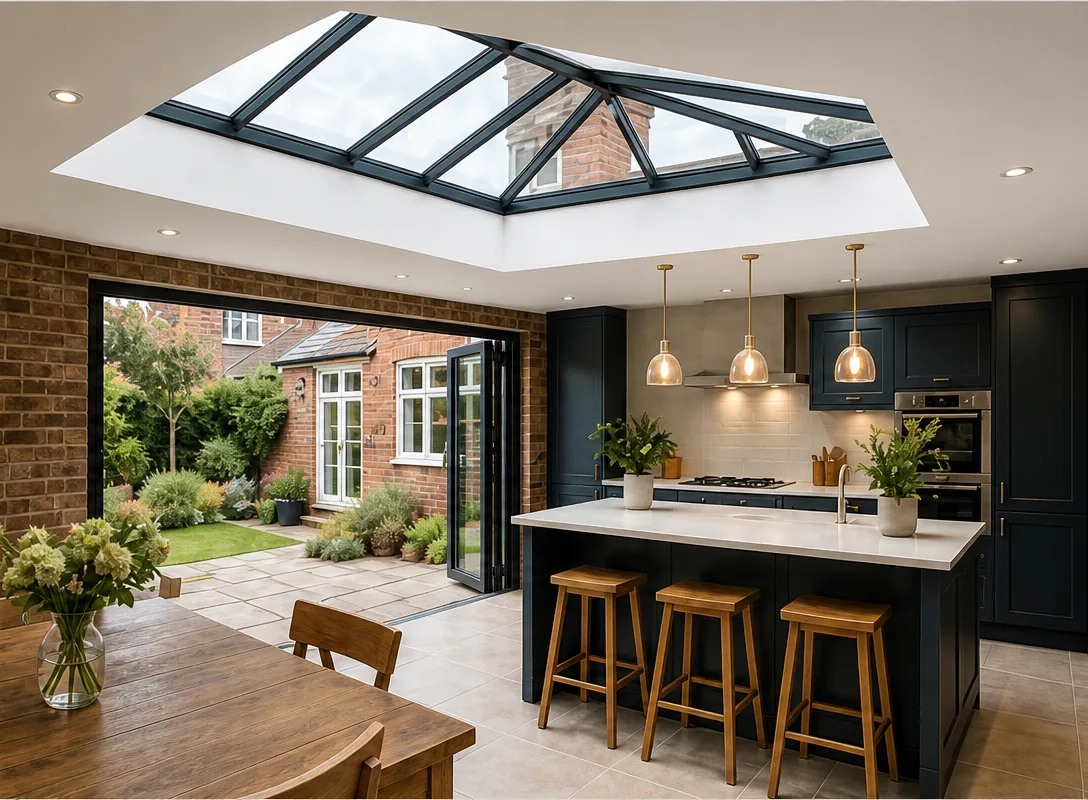
- Aluminium or uPVC frames
- Double or triple glazing
- An insulated upstand
- Building Control notification handled

Why lanterns disappoint
Sized to the brochure, not the room
Too big and the room glares, too small and it looks like an afterthought.
A cold, thin upstand
The kerb is where heat and condensation gather if it is skimped.
A finish left for someone else
The plaster reveal around the opening decides how the job looks for years.
What goes into a Prestige roof lantern
| Frame | Thermally broken aluminium or reinforced uPVC |
|---|---|
| Glazing | Argon-filled double or triple glazing with low-E coating |
| Inner pane | Laminated glass on the room side |
| Upstand | Insulated timber kerb at least 150mm above the roof |
| Reveal | Insulated lining, plastered and ready to paint |
| Paperwork | Product details, guarantee and Building Control certificate |
Your fitting, day by day
- 01
Survey
We measure the roof and the room and agree the size.
- 02
Opening and upstand
Floors covered, roof opened, kerb built and made weathertight.
- 03
Lantern and glazing
Frame set, glass fitted, roof finished around it.
- 04
Reveal and handover
Lining finished, area cleaned, paperwork walked through.
Roof lantern questions
Do roof lanterns need planning permission?
It depends on the height. Permitted development for roof alterations allows glazing to stand up to 150mm above the roof plane, and most lanterns rise further than that, so a lantern on an existing roof often needs either a planning application or a confirmation from the council first. A lantern built as part of a new extension is usually assessed with the extension itself. Listed buildings always need consent. We check your case at the survey, and our planning answer covers the detail.
Can a lantern go on my existing flat roof?
Often, yes. The survey checks the joists, the roof build-up and the condition of the covering. Where the roof is sound, we cut the opening, trim the joists and build the upstand into it. Where the covering is near the end of its life, we tell you, because it makes sense to deal with both at once.
Aluminium or uPVC?
Aluminium gives slimmer bars and a crisper look, and suits larger lanterns. uPVC costs less and performs well on smaller sizes. Both can meet the thermal standard. We show you samples of both at the survey.
How long does fitting take?
Most single lanterns take a few days from opening the roof to handover, with the roof made weathertight every evening. Your day plan sets out exactly what happens when, before we start.
The whole job
Everything that goes into fitting a roof lantern properly
Choosing the size and frame, building the upstand, the glass, the rules, and what each day of the fit looks like in your home.
The product
What a roof lantern is, and the rooms it suits
Roof lantern installation in York is mostly about one kind of room: the kitchen-diner or family room at the back of the house that was extended outwards and lost its daylight in the process.
A roof lantern is a raised, pitched glazed structure that sits on a flat roof. Where a flat rooflight is a single pane of glass lying almost level, a lantern rises in a shallow pyramid or a ridged roof shape, with glazing bars running from a central ridge or hub down to a perimeter frame. That shape does two useful things. It sheds rain quickly, and it lets light in from every direction, so the room underneath gets daylight across the whole day rather than only when the sun is overhead.
Lanterns suit rooms where people gather and where the middle of the room is furthest from any window. A rear extension on a York terrace or semi is the classic case: the new room is deep, the old back wall has been knocked through, and the kitchen at the far end ends up darker than the house was before. A lantern over the dining table or the island brings the light back to the centre.
Rooms that suit a lantern
- Kitchen-diners built out from the back of the house
- Single-storey family rooms and garden rooms
- Orangery-style extensions with a solid roof and a glazed centre
- Deep open-plan spaces where windows only reach one end
- Rooms where you want light without losing wall space for units
- Extensions where a flat rooflight would look too plain
If the room is small, or the roof is pitched, a lantern is probably not the answer. A flat rooflight may suit a smaller flat roof better, and a pitched roof calls for a roof window. If another product would serve the room better, we say so at the survey.
Sizing
Sizing the lantern to the room
The commonest regret with a roof lantern is the size. It is easy to choose from a brochure and much harder to undo once the roof is cut.
A lantern that is too large for the room floods it with light in summer, can make the room feel like a conservatory, and takes up roof that might have been better left solid. One that is too small looks like an afterthought and lights a single spot on the floor. The right size depends on the floor area, the ceiling height, which way the room faces and what is happening under it. A lantern centred over a dining table wants to relate to the table. One over a kitchen island wants to line up with the island, not with the middle of the roof.
At the survey we measure the room and the roof, look at the joist layout, and mark out the opening on the ceiling so you can stand underneath it and see the size in place. That simple step, chalk lines on the ceiling, settles more decisions than any drawing. We then check that the opening works with the joists. Every joist we cut has to be trimmed, so an opening that lines up with the existing structure is quicker, tidier and stronger.
Stand under the chalk lines at different times of day before you settle on a size.
From a lantern survey
Our roof lantern sizes guide goes into the standard sizes, made-to-measure options and how to relate the lantern to the room below.
The frame
Aluminium or uPVC
Both materials make good lanterns. The difference is in the look, the span and the cost, and the choice is usually clear once you see both side by side.
Aluminium lanterns use thermally broken profiles, which means the outer and inner parts of each bar are separated by an insulating strip so the cold does not run straight through the metal. Aluminium is stiff, so the glazing bars can be slim, which gives a crisper, lighter look and allows bigger spans. It is powder coated, often in grey or black outside with white or a matching colour inside.
uPVC lanterns use reinforced plastic profiles. The bars are chunkier, which suits a more traditional look and shows less on a smaller lantern. uPVC costs less and performs well thermally. On a large lantern the bars become noticeably heavier, which is why aluminium is the usual choice once the lantern gets beyond modest sizes.
| Look | Aluminium: slim bars, crisp lines. uPVC: chunkier bars, softer look |
|---|---|
| Span | Aluminium suits large lanterns; uPVC suits small and medium sizes |
| Colour | Aluminium: powder coated, wide range. uPVC: white, foiled greys and woodgrains |
| Thermal | Both can meet the standard with the right glazing |
| Cost | uPVC usually costs less for the same size |
| Upkeep | Both need only an occasional wash of the frame and glass |
We bring samples of both to the survey. If you are torn, our guide to choosing an aluminium or uPVC roof lantern goes through the trade-offs in more detail.
The upstand
The upstand under the lantern
The upstand, or kerb, is the raised frame the lantern sits on. Nobody admires it, but it governs how warm and dry the edge of the lantern stays for years.
The upstand lifts the lantern clear of the roof surface so rainwater runs away from the frame instead of sitting against it. It also carries the weight of the lantern, forms the edge of the roof covering and, on the inside, becomes the reveal you see from the room. If it is built from thin timber with no insulation, it becomes the coldest part of the room. That is where condensation forms in winter and where a draught seems to come from even when the lantern itself is sealed.

We build upstands from treated timber, at least 150mm above the finished roof, and insulate them with rigid board that meets the insulation in the roof itself so there is no cold ring around the opening. The roof covering is dressed up the outside of the kerb and sealed under the lantern frame. Some lanterns come with a factory-made insulated upstand, which can be the right choice on a new roof. On an existing roof we often build the kerb on site so it can be fitted to the joists that are actually there.
| Structure | Treated timber kerb fixed to trimmed joists |
|---|---|
| Height | At least 150mm above the finished roof surface |
| Insulation | Rigid insulation board, lapped to the roof insulation |
| Weathering | Roof covering dressed up the kerb and sealed under the frame |
| Inside face | Insulated lining, plastered and ready to decorate |
More detail on kerbs, factory upstands and heights is in our guide to the roof lantern upstand.
The glass
Choosing the glazing
A lantern is mostly glass, so the glazing has more effect on the room than anything else you choose.
Every lantern we fit uses sealed units with a low-emissivity coating and gas-filled cavities, either double or triple glazed. Triple glazing is warmer and quieter, which helps in rain, and is worth considering on a large lantern over a room you use all evening. On a lantern facing south or west, solar control glass reduces the heat that builds up on a bright summer afternoon. Self-cleaning coatings on the outer pane help rain wash the glass and keep it clearer between cleans.
On the room side we specify laminated glass. If the inner pane is ever broken, a laminated pane holds together on its interlayer rather than falling into the room, which matters when the glass is over a table, a hob or a sofa. Your survey notes list the glazing we recommend and the reason for it, so you can decide where to spend.
Glazing options we talk through
- Double or triple glazed units with low-E coating
- Laminated inner pane for overhead safety
- Solar control glass for south and west facing lanterns
- Self-cleaning coating on the outer pane
- Tinted or neutral glass to suit the room
- Warm-edge spacers in the sealed units
If you want to compare the options in detail, our answer on what glass a roof lantern should have covers each one, and the rain noise answer explains what the glazing does for sound.
The rules
Planning permission and Building Regulations
Lanterns raise one planning question that flat rooflights usually do not, and it comes down to height.
Rooflights on houses usually fall within permitted development, the set of changes you can make without applying for planning permission. One of the limits is that the glazing must not stand more than 150mm above the plane of the roof. Most lanterns rise further than that once the upstand and the pitched glass are counted. So a lantern added to an existing flat roof often needs either a planning application or a written confirmation from the council that it is acceptable. Where the lantern is built as part of a new extension, it is usually considered together with the extension itself.
Listed buildings need listed building consent for a lantern whatever the planning position, and flats do not have permitted development rights at all. In York, City of York Council handles planning for the city and its villages; in the towns around it, the planning authority is usually North Yorkshire Council, East Riding of Yorkshire Council or Leeds City Council. We tell you at the survey which one applies to you and whether we think an application is needed.
| Lantern on an existing roof | Often needs an application or a council confirmation, because of the 150mm limit |
|---|---|
| Lantern in a new extension | Assessed with the extension itself |
| Listed building | Listed building consent needed |
| Flat or maisonette | No permitted development rights, so an application is needed |
| Building Regulations | Needed for the structural opening and the controlled fitting; we handle it |
| Thermal standard | Rooflight U-value of 2.2 W/m²K or better |
Building Regulations apply to almost every lantern job. Cutting joists to form the opening is structural work, and the lantern itself must meet the thermal standard for rooflights in Part L, a U-value of 2.2 W/m²K or better. We handle the Building Control side, arrange the inspections and hand you the paperwork. Our answer on whether roof lanterns need planning permission sets out the planning position in more depth.
Existing roofs
Adding a lantern to the roof you already have
A lantern often goes onto an existing flat roof rather than a new extension, and that brings its own checks.
An existing roof has a structure and a covering that were not designed with a lantern in mind. Before we quote, we look at which way the joists run, how deep they are, what the roof build-up is (whether the insulation sits above or below the deck), and what condition the covering is in. A felt roof near the end of its life is better replaced at the same time as the lantern goes in, because patching new work into tired felt rarely lasts. A modern rubber or fibreglass roof in good condition can usually be cut and re-formed around the upstand cleanly.
What we check on an existing flat roof
- Joist direction, size and spacing over the chosen position
- Whether the roof is a warm roof or a cold roof build-up
- The covering: felt, rubber or fibreglass, and its condition
- Falls, so water still drains away once the lantern is in
- Cables, downlights or pipes in the ceiling void
- Safe access to the roof for the fitting days
If any of these turns up a problem, the survey notes say so and the quote shows what it adds. Our answer on whether a roof lantern can go on an existing flat roof covers the common situations.
Your day plan
What each day of a lantern fitting looks like
A lantern is a bigger hole in the roof than a single rooflight, so the plan for each day carries more weight.
Before any work starts, the room below is cleared as far as you want it cleared, and everything left in it is covered. Floors along the route from the door are protected, and we screen off the work area where the layout allows. We check the forecast and set the opening day for dry weather. The roof is never left open overnight: at the end of each day the opening is either glazed or closed with a fixed temporary cover.
A typical lantern fitting
- ProtectionRoom cleared or covered, floors protected, work area screened off.
- Opening and kerbCeiling and roof cut, joists trimmed, upstand built and weathered.
- Lantern and glassFrame fixed to the kerb, glass installed, roof covering finished round it.
- Reveal and handoverLining plastered, area cleaned, the finished lantern walked through with you.
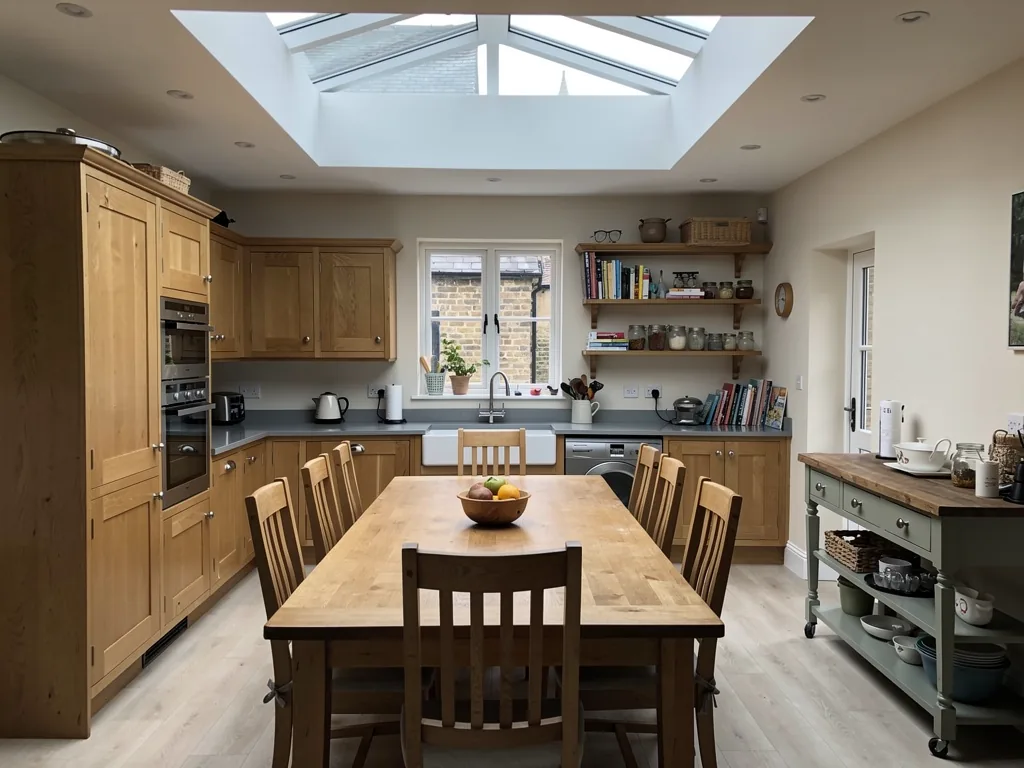
If the plaster needs time to dry before decorating, the plan says so. If you have a party, a delivery or a working day at home, tell us at the survey and we will plan around it.
York homes
Lanterns on York extensions
Around York, lanterns tend to go onto one of a handful of extension types, and each has its own quirks.
On Victorian and Edwardian terraces, in streets like those in South Bank, the Groves and Leeman Road, the usual project is a side-return or wrap-round kitchen extension. These rooms are long and narrow, they sit hard against a neighbour's wall, and the only daylight comes from the garden end. A long, narrow lantern running down the centre of the room, or a lantern paired with a flat rooflight along the party wall, suits that shape far better than a square lantern dropped in the middle. Party walls also bring the Party Wall Act into play if the extension itself is new, which is something your builder or surveyor will have dealt with before we arrive.
On 1930s semis in Acomb, Dringhouses and Heworth, single-storey rear extensions tend to be wider and squarer, and a classic square or rectangular lantern over a dining area works well. In the villages around the ring road, bungalows often have older flat-roofed extensions from the 1970s and 1980s, with felt roofs that are near the end of their life. There, fitting a lantern is often the moment to re-cover the roof with a modern membrane at the same time, so the new glazing sits on a roof that will last as long as it does.
What changes with the house type
- Terrace side returns: long, narrow lanterns that follow the room
- Party walls: the lantern set back so flashings stay on your side
- 1930s semis: square or rectangular lanterns over the dining area
- Village bungalows: a tired felt roof re-covered at the same time
- Conservation areas: slimmer frames and darker colours where the street can see them
- New extensions: the opening framed by the builder to our sizes
If your extension is still being built, we are happy to talk to your builder early so the roof is framed to the lantern's exact size. That saves cutting and re-trimming later and keeps the upstand detail right from the start.
Living with it
Heat, shade and fresh air under a lantern
A lantern changes how a room feels through the year, so picture summer afternoons and winter evenings under it before you choose.
In summer, a large area of glass overhead lets in a lot of sun. On a south or west-facing extension, solar control glass reduces the build-up of heat without making the room feel dim. Some lanterns can also be fitted with opening vents, either manual or electric, which let warm air escape at the highest point of the room. Air rises, so a vent in the lantern does more to cool the room than opening a door at floor level. Electric vents can be paired with a rain sensor so they close themselves when the weather turns.
In winter, the question is warmth. Modern lantern glazing loses far less heat than the polycarbonate roofs of older extensions, and the insulated upstand stops the cold edge that used to form round the opening. Some people still like the option of shading at night, and fitted blinds are available for many lanterns, though they add to the cost and are easier to plan in from the start than to add later.
Ask yourself how the room will feel at four o'clock on a sunny July afternoon, and choose the glass for that moment.
From a glazing conversation at a survey
Our guides to solar control glass and opening rooflights for ventilation go into both questions in more depth.
Inside
The inside finish around the lantern
From the room, you see the reveal around the lantern far more often than you see the lantern itself, so we treat the finish as part of the job.
The reveal is the lined box between the ceiling and the lantern frame. It can be straight-sided or splayed outwards, which lets the light spread further into the room. We insulate it, line it with board, and plaster it to a smooth finish ready for paint. Where the reveal meets the ceiling, the corner is formed cleanly so it does not crack later. Any downlights or a pendant over the table are planned in at the survey, so cables are in place before the ceiling is closed up.
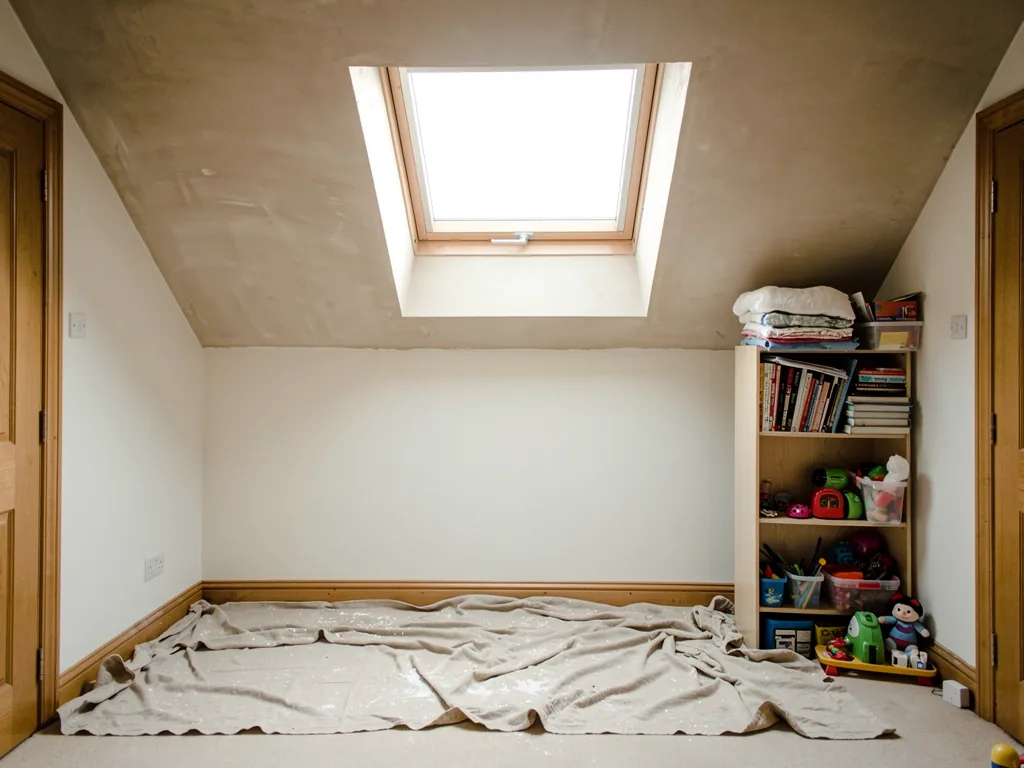
Think about lighting at the same stage. A lantern is a bright room's centrepiece in daylight and a dark hole in the ceiling at night unless something lights it. Small LED strips hidden along the top of the reveal, or downlights set into the ceiling just outside the opening, keep the space feeling finished after dark. Both are far easier to wire before the lining is closed, so we ask about them at the survey and leave the cables ready for your electrician if you would rather they did the connection.
Some people want to decorate themselves. Others want the job finished, painted and ready to use. Both are fine, and the quote shows the finishing as its own line so you can choose. Either way, we do not leave a rough opening for someone else to sort out.
Replacement
Replacing an old roof lantern
Lanterns from earlier decades were often glazed with polycarbonate or with sealed units that have since failed, and plenty of York extensions still have one that leaks heat or has clouded over.
The signs are familiar: misting between the panes, yellowed or cloudy polycarbonate, cold draughts round the frame, or water marks on the reveal below. Where the upstand and roof are sound, a new lantern can often go onto the existing kerb, with the kerb insulated and re-weathered at the same time. Where the kerb is undersized or poorly built, we rebuild it rather than set a new lantern on a kerb that will let it down. If only the glass has failed, our misted and failed rooflights service covers replacing sealed units on their own.
Signs an old lantern is due for replacement
- Misting between the panes of the sealed units
- Cloudy or yellowed polycarbonate sheets
- A cold draught where the frame meets the kerb
- Water marks on the reveal or the ceiling below
- Glazing bars that have sagged or opened at the joints
- A kerb so low that water sits against the frame
A whole new lantern is a controlled fitting under Building Regulations, so we handle the notification, just as we would for a new installation.
Cost
What sets the price of a roof lantern
We price every lantern from a survey, because the same lantern costs very different amounts on different roofs.
| Size and shape | Larger and made-to-measure lanterns cost more than standard sizes |
|---|---|
| Frame | Aluminium usually costs more than uPVC of the same size |
| Glazing | Triple glazing and solar control add to the unit price |
| Roof | Re-covering a tired roof at the same time adds cost but saves future work |
| Structure | Openings across several joists need more trimming |
| Finish | Plastering and decorating the reveal can be included or left to you |
Each of these appears as its own line on your written quote. Our roof lantern cost guide explains each factor in more detail.
Handover
Handover, care and the guarantee
When the lantern is in, we walk you through it and leave you with everything you need to look after it.
A lantern needs very little care. The glass benefits from a wash a few times a year, more often under trees, and the gutters around the extension roof should be kept clear so water drains away from the upstand. We show you how to clean the glass safely from a ladder platform or with a long-reach pole, and what to avoid. Our answer on how to clean a roof lantern has the detail.
Your handover pack
- Product details and the maker's warranty for the lantern and glass
- Your 10-year workmanship guarantee in writing
- The Building Control completion paperwork
- Photographs of the kerb and weathering before they were covered
- Cleaning and care notes
- A clean room with your furniture back in place
The guarantee covers our workmanship for ten years: the opening, the upstand, the fixing of the lantern and the weathering into your roof. You can read the details on our guarantee page, or start with a free survey using the form below.
Read more about roof lanterns
Guides
Tell us about the room
Send a few details about the room and the roof, and we will arrange a free survey and a written quote for your lantern.
- Free survey at a time that suits you
- A written quote and a plan for each day
- 10-year workmanship guarantee
Prefer a message? WhatsApp us on 07880 284133